Introduction
Welcome to this comprehensive guide on how to integrate Google Drive with the Empress Framework. Relying on Google Drive’s robust file storage and synchronization features, this integration allows you to select any file from Google Drive and attach it to a DocType in your Empress application. This can greatly enhance the flexibility and efficiency of file management in your software development efforts.
Introduction to Google Drive Integration
The Google Drive Integration is a notable feature in the Empress framework that allows developers to leverage the power of Google Drive’s file storage and synchronization services. This feature is particularly useful for business applications where documents like invoices or contracts need to be attached to specific records in the database.
Setting Up Google Drive Integration
Google Cloud Console
To integrate Google Drive into the Empress framework, we need to first obtain credentials from Google Cloud Console. Follow the steps below to generate necessary API keys and OAuth 2.0 credentials:
- Navigate to the Google Cloud Console and create a new project.
- Enable the Google Picker API for your project.
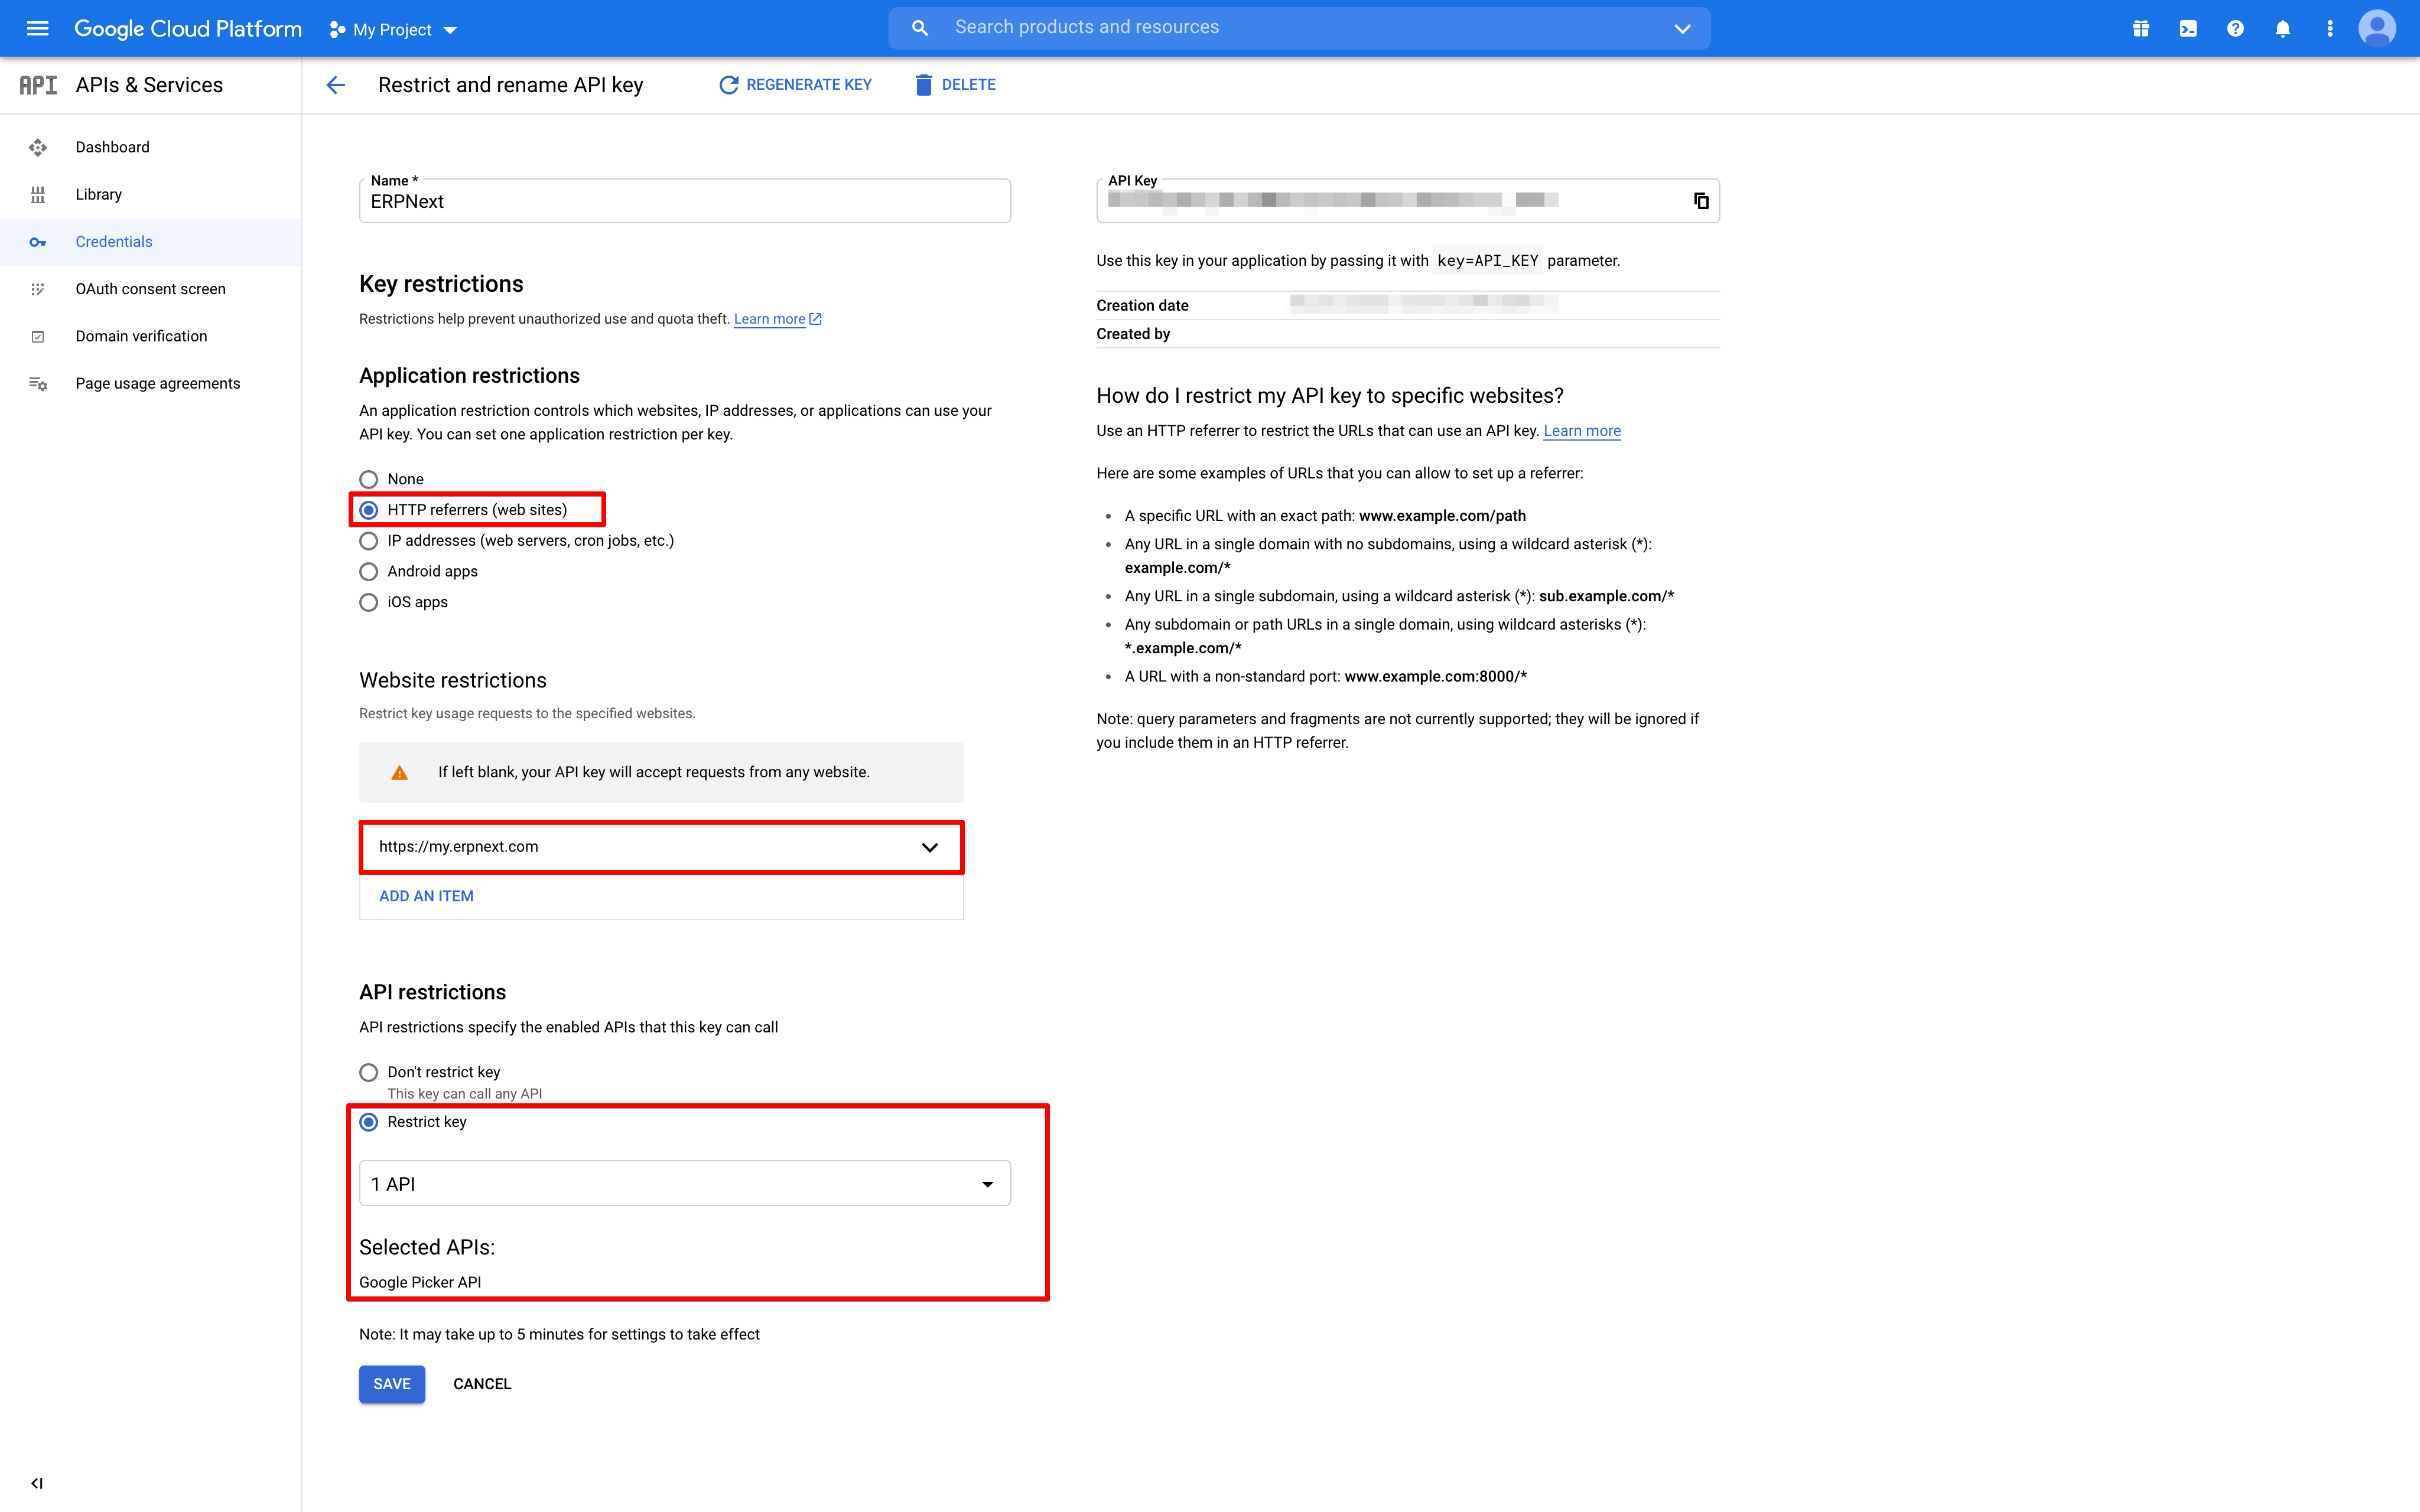
- Within the API keys section, click Create credentials > API key to create your application’s API key.
- Configure the API key with the following restrictions:
- Application restrictions: Choose “HTTP referrers”
- Website restrictions: Add your Empress instance’s hostname
- API restrictions: Choose “Restrict key” and select the “Google Picker API”
- Create your OAuth 2.0 credentials by clicking Create credentials > OAuth client ID.
- Application type: Choose “Web application”
- Authorized JavaScript origins: Add your Empress instance’s hostname
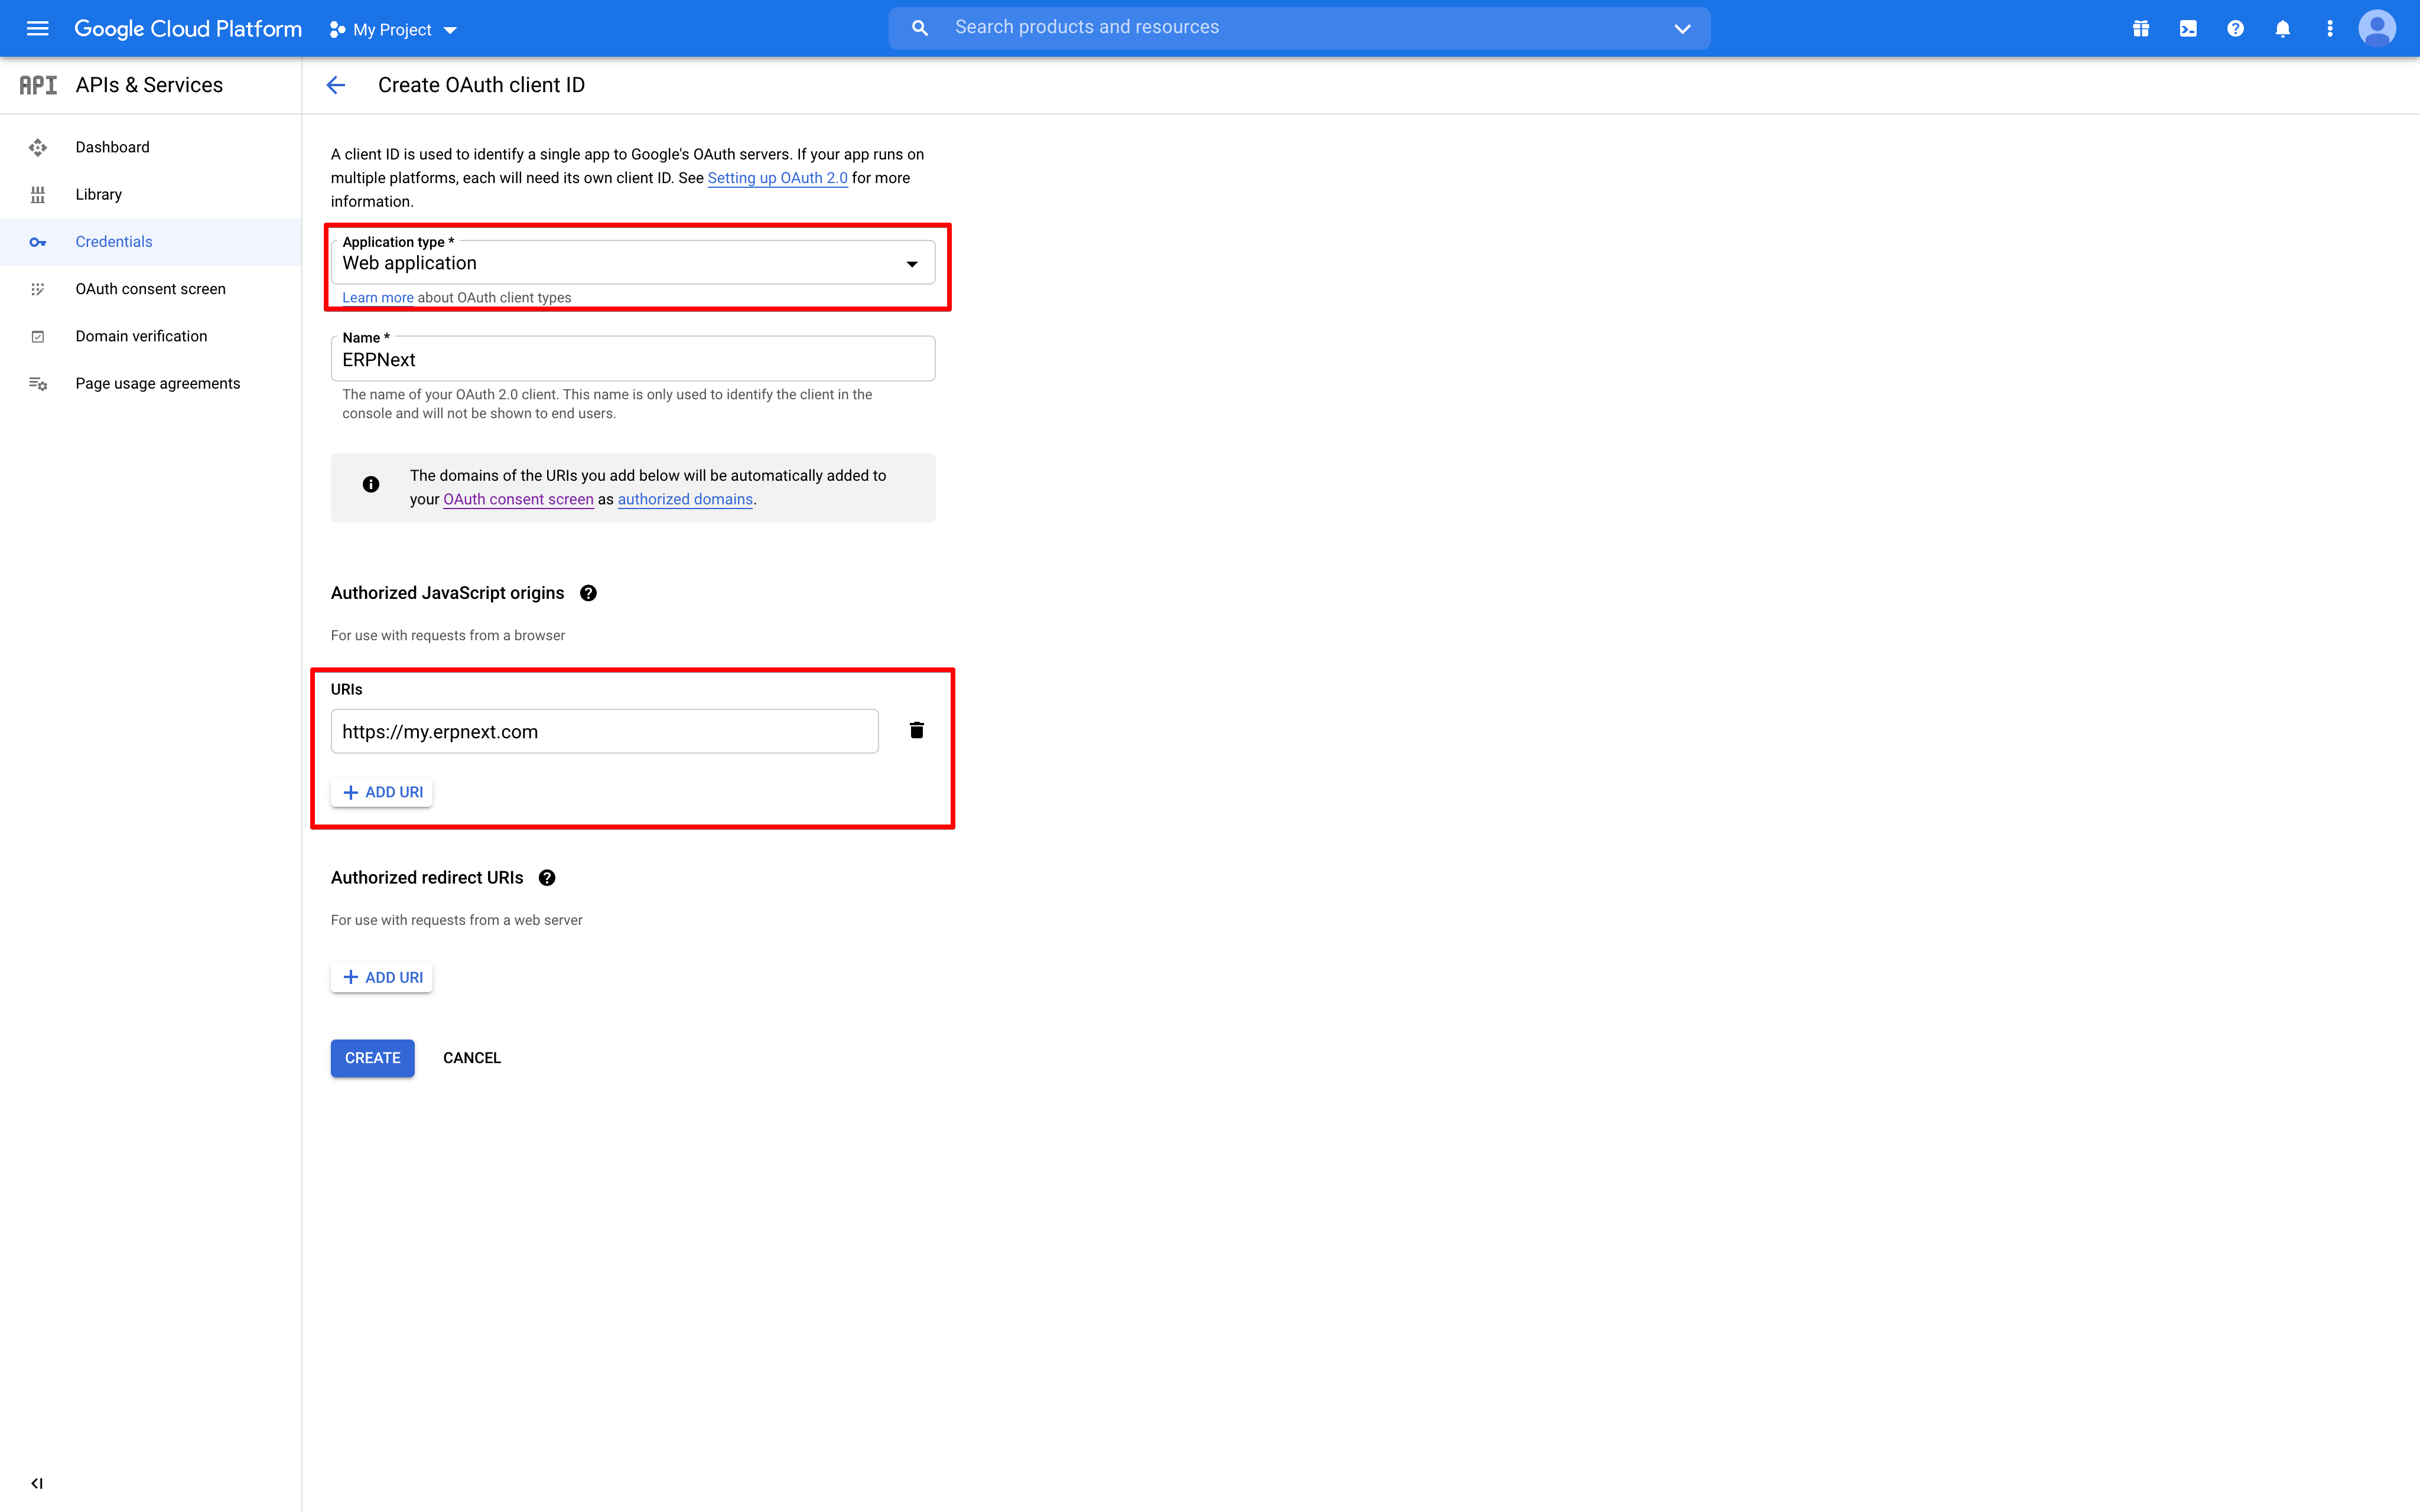
- Note down your client ID available on the Credentials page.
- Lastly, configure the OAuth Consent Screen and add the scope
https://www.googleapis.com/auth/drive.readonlyon the Scopes page. - Locate your project number under IAM & Admin > Settings. This will be your App ID.
Empress Instance Configuration
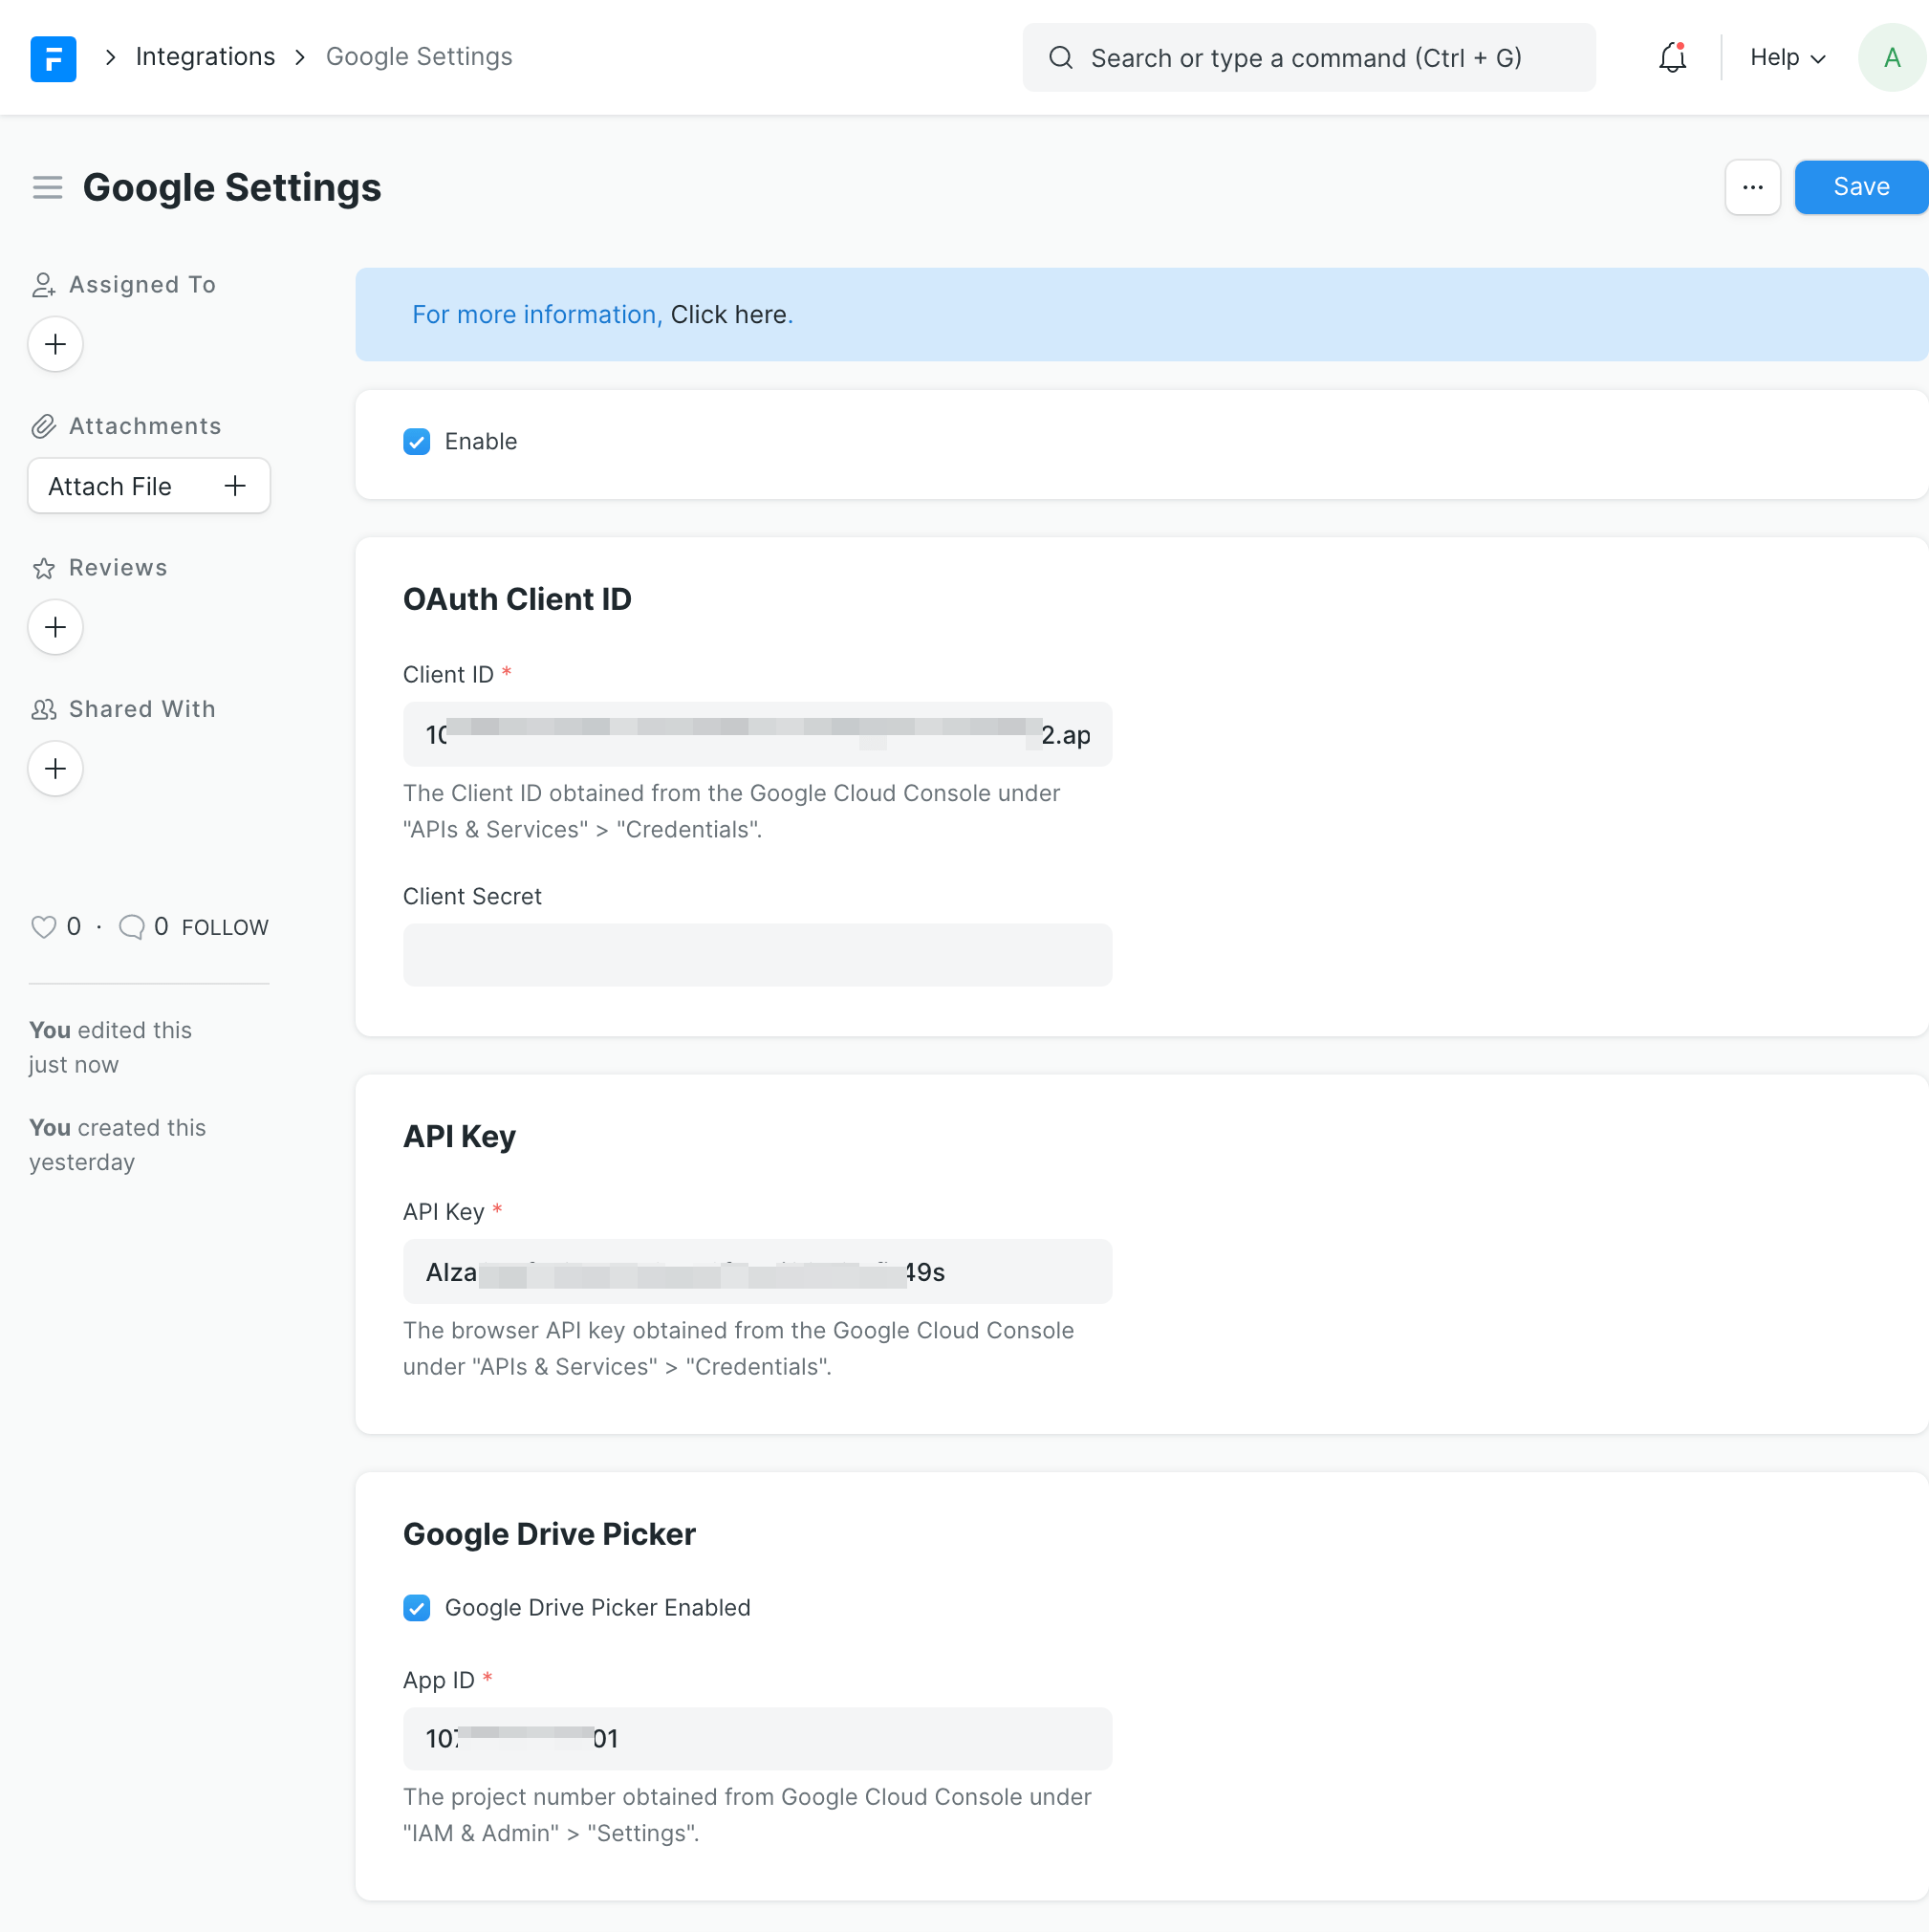
After enabling the Google Picker API and acquiring the necessary credentials, the next step is to configure the Google Settings in your Empress instance.
- Navigate to Google Settings in your Empress instance.
- Enable the Google Drive Picker by checking the appropriate checkbox.
- Enter your previously obtained App ID, Client ID and API Key.
- Save the Google Settings and reload your browser window.
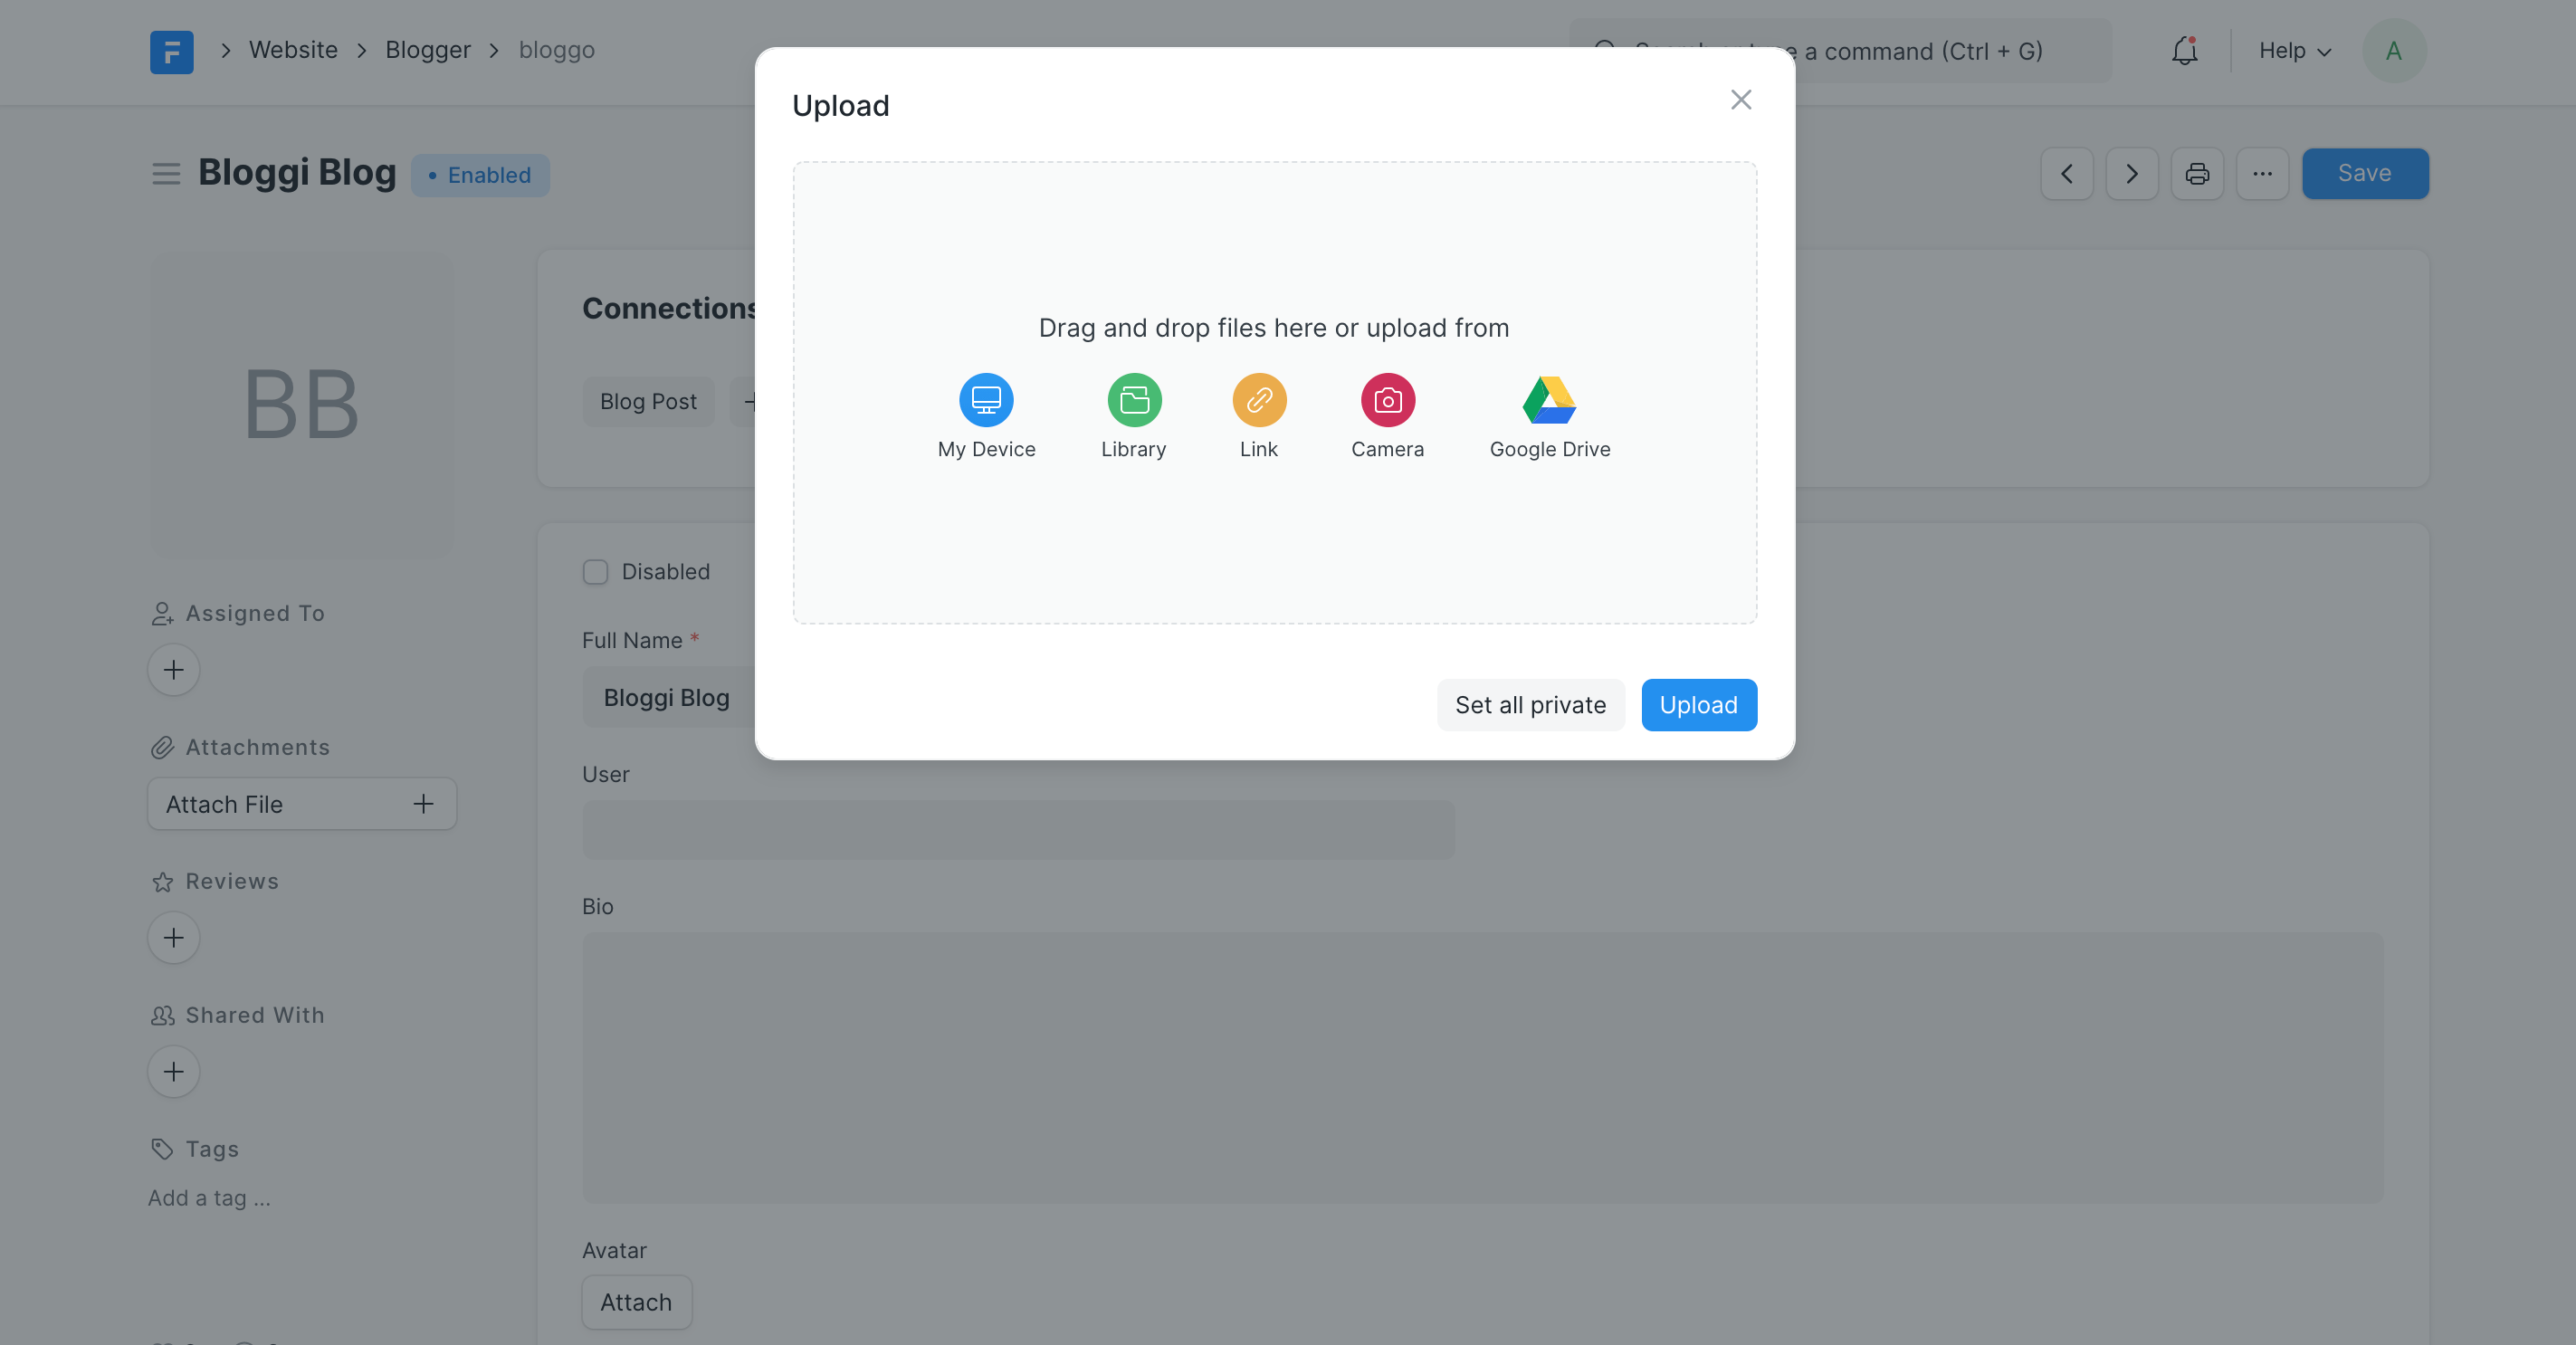
With Google Drive now integrated, you can attach files from Google Drive to a DocType in your Empress application. When you click on “Attach file”, you will now see the Google Drive icon.
Conclusion
The Google Drive Integration enhances the functionality of the Empress framework by offering an efficient and secure method of attaching files from Google Drive to Empress’ DocType. This feature opens up new opportunities for developers to create more robust and dynamic business applications. It also brings an additional layer of flexibility to the software development process, allowing for easy management and synchronization of files across multiple platforms.